How to Turn a Landscape Video into a Vertical Edit
Choose between cropping and a contained layout, keep important details visible, and check the vertical export on a phone.
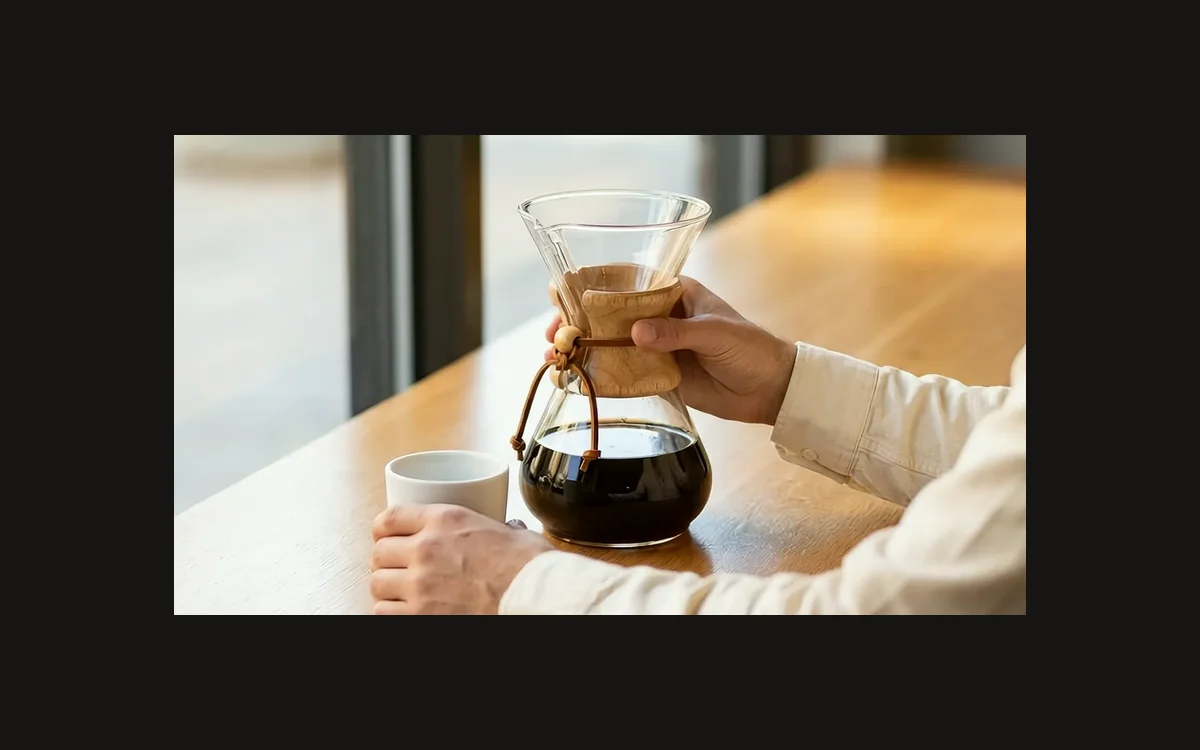
Watch the horizontal coffee clip and the separate vertical export below. Both use a fresh Gallery-directed scene of the real six-cup classic CHEMEX. The vertical version keeps the brewer visible by choosing a crop that fits the action; it is not simply the horizontal video squeezed into a tall frame.
Decide whether a crop can preserve the useful picture
Choose the layout before moving a crop box. A crop-to-fill edit removes the sides and fills a vertical screen. A contain layout keeps the whole wide image and leaves space above and below. A designed layout can use that space for a heading or another view. Choose according to what the viewer needs to see.
Our scene centres the CHEMEX, its wooden collar and the hands holding it. The surrounding table gives the original room to breathe. That makes a vertical crop possible without cutting the brewer itself in half. A scene with essential subjects at opposite edges would need a different layout or another shot.
The starting photograph was made from the real product reference and a Gallery café scene. We then generated a new horizontal clip in Image to Video. Its centred composition gives the crop room to follow the brewer without losing the wooden collar or glass base.
Check the action, not only the opening frame
Watch the entire horizontal clip before choosing the crop position. Check the glass rim, wooden collar, lower base and hands at the beginning, middle and end. A crop that looks good on the first frame may fail if the subject moves toward an edge later.
This source is a quiet five-second shot with only a gentle push. The brewer stays close to the centre, so a fixed crop is enough. The white cup and the outer part of a sleeve fall outside the vertical frame, but the complete brewer and useful grip remain visible. That is a deliberate editorial choice.
If the important action moves sideways, use a position change over time or cut to a second view. Do not let an automatic subject tracker make that decision without watching the result. A tracking box can follow a face while leaving the product outside the frame.
Set the project format before placing titles
Create a vertical project or export canvas first. For this example the downloaded horizontal source is 1918 × 1080. We take a centred 608 × 1080 crop, starting 655 pixels from the left edge, and export it as 576 × 1024 with square pixels. The final file has an exact 9:16 frame.
Those numbers are specific to this clip, not universal crop settings. The useful process is to calculate the available width from the source height, place that window over the essential action, and check the whole timeline. Do not stretch the horizontal picture to make the dimensions fit.
The planner below lets you explore crop-to-fill and contain layouts using the actual source poster. It is a visual planning aid, not a video exporter. The playable vertical file above is a separate rendered crop, so readers can inspect the real result as well as the still-frame layout.
Check the crop at the final viewing size
A vertical crop uses fewer source pixels than the horizontal frame. Enlarging that crop to a larger export does not recover detail that was outside it. Choose a sensible output size and inspect small product features before assuming that a larger number makes a better file.
For the coffee example, 576 × 1024 keeps the export close to the pixels available in the crop. The glass edge and collar remain clear enough for this short web demonstration. A larger advertising delivery may call for a higher-resolution source or a dedicated vertical generation.
Review the export on a phone-sized screen. Leave essential details away from the edges, and remember that platform captions and buttons can cover the lower frame. If you add text later, check the finished placement rather than relying on the empty video’s safe space.
Make a vertical source when the landscape shot cannot work
When a crop fails, improve the source instead of forcing it. Give the original shot more room around the subject, keep important action near a shared centre area, or make a separate vertical shot from the same real product reference and Gallery direction.
Our horizontal motion brief explicitly asked for the brewer to remain near the centre so a vertical reframe would be possible. Planning that before generation is easier than trying to repair a clip in which a hand and product travel to opposite edges.
Finally, compare both exports without pausing. Check that the product remains recognisable, the movement feels intentional, and the ending is complete. Keep the wide source as well as the vertical file so a future square or portrait placement can be made from the original pixels.
Product and photographic sources:
Six-cup classic CHEMEX ·Gallery source for Horizontal source: @yasminearabella
To continue your video-editing workflow, explore Affogato Studios. For individual creation tools, browse Affogato Tools.